How to Use the NetSuite Payment Plugin To Email An Invoice with a Digital ‘Pay Now’ Button in your e-Invoice

In our last article, we wrote about the features to consider when choosing a NetSuite payment plugin to cut costs, improve efficiency, and eliminate manual processing. These features will help you maximize your NetSuite investment.
In this article, we will review the general set up and implementation you can expect from a top payment plugin in NetSuite. This plugin will help you digitize your receivable payment cycle and more easily transition from invoice to cash.
Step 1: Install and configure your payment plugin
Many of the leading payment modules can be found in both NetSuite’s Marketplace and directly on a payment site. (Pro tip, look for a plugin with auto-reconciliation, multiple payment rails and full digitization options.)
Step 2: Now that it is installed, your next step is to choose a customer with an outstanding balance. This information should be available from your NetSuite records.
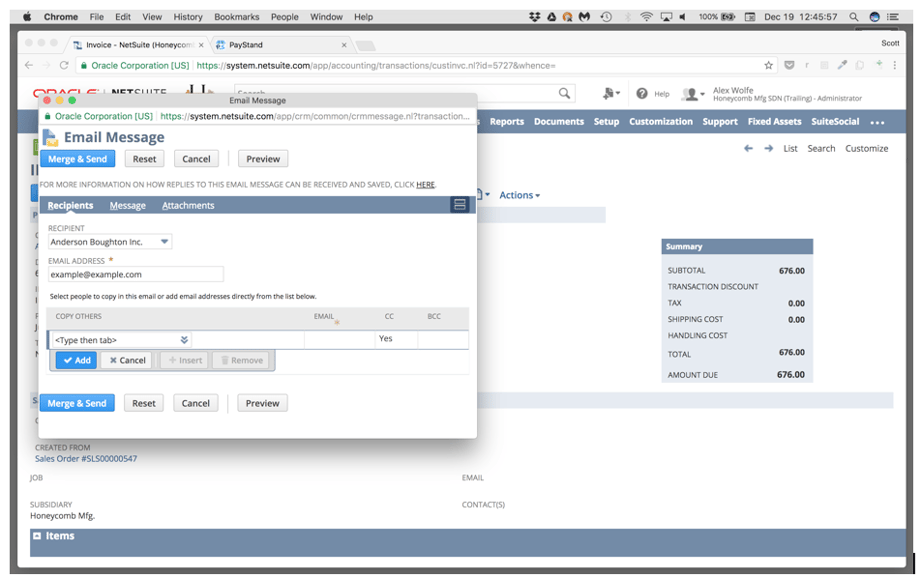
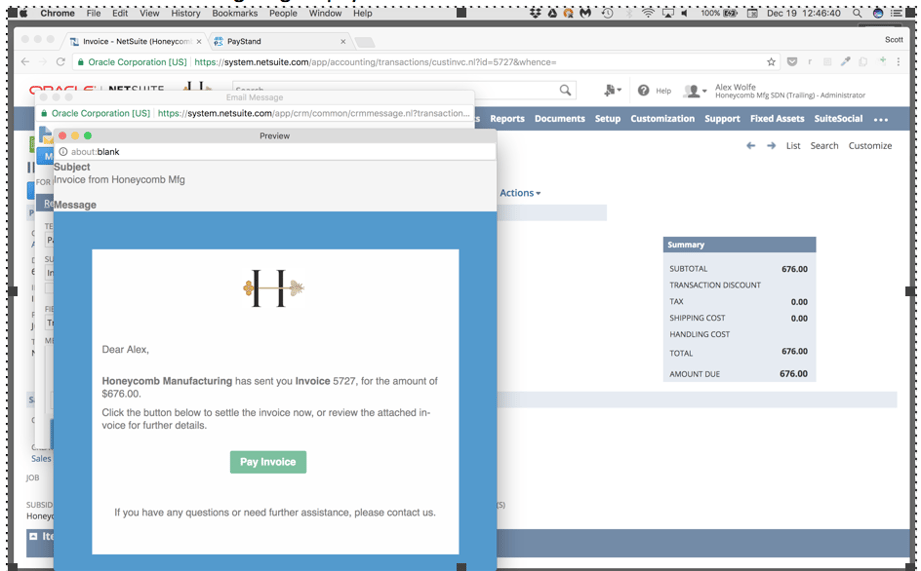
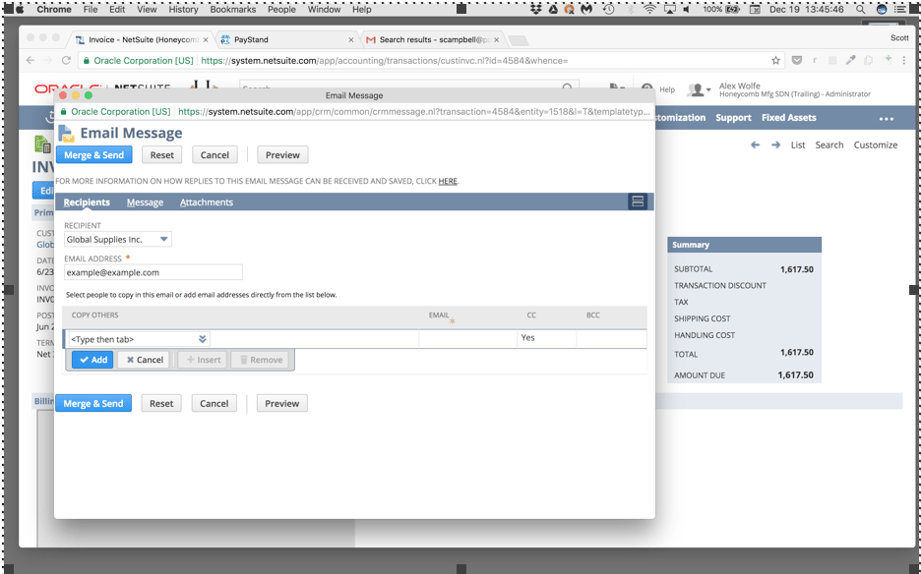
Step 3. Send the invoice – your customer will receive a message similar to the one in the image below. They should now have a “Pay Now” or “Pay Invoice” button so they can immediately settle the balance through digital payment.
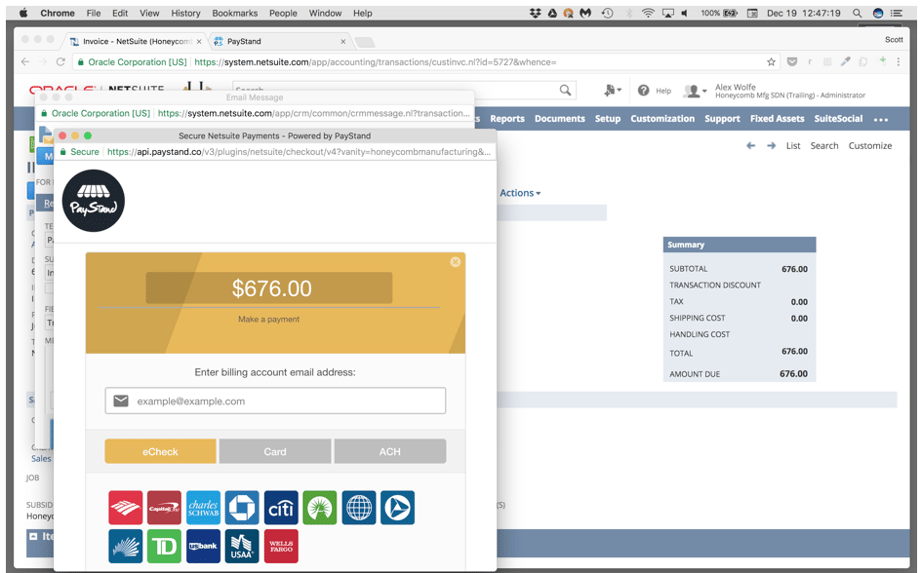
Step 4. The top payment plugins for NetSuite, such as PayStands will allow your customers to choose the type of rail through which they should remit payment i.e, eCheck, card or ACH. Multiple payment rails are important because this will end up being a big cost saver. With access into our 0% payment network through eCheck and ACH, it may be wise to only allow these two rails as options for your higher transaction amounts. This has also been proved to increase payment remittance by making it the most convenient as possible for your customers preferences to be allowable.
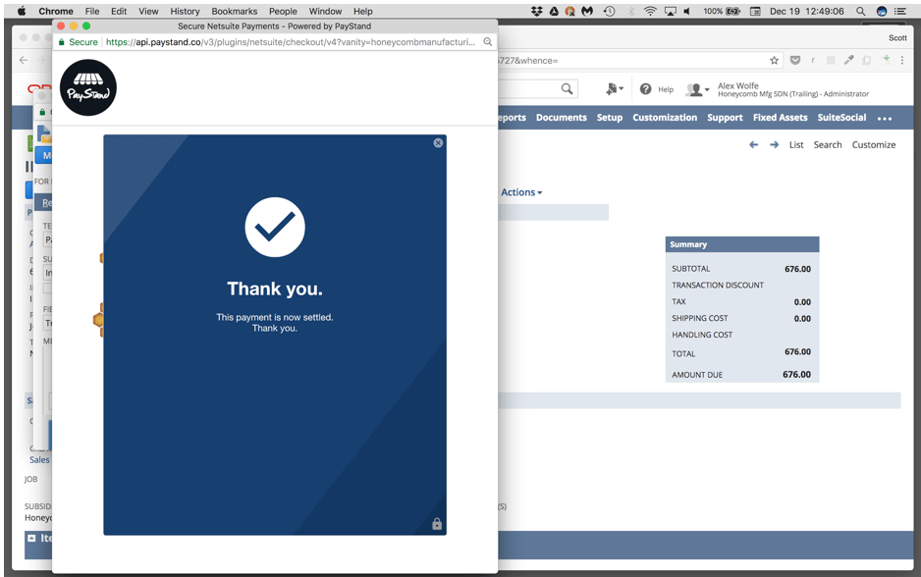
Step 5 - After your customer submits their payment method, they will receive a notification that their balance is now settled.
You should also have the option to email your customer a digital receipt of payment in NetSuite: Leaders in NetSuite payment plugins like PayStand, can also be configured to send customer branded receipts if desired.
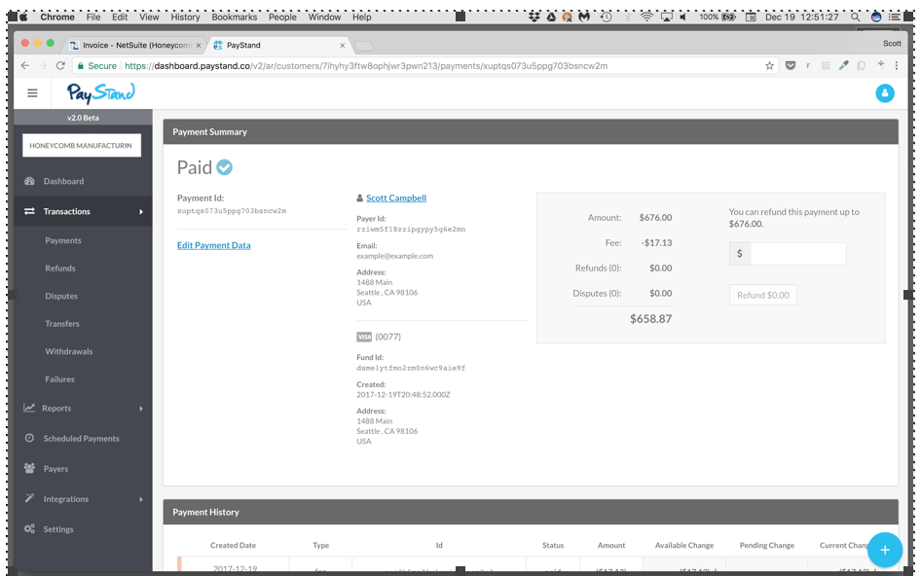
Step 6. An important consideration is to find a payment platform that offers a feature-rich back office dashboard. They should have critical capabilities such as reporting and the ability to refund payment from within the dashboard - as seen in the right side of the image below. Internally, you should have visibility into the payment life-cycle (as well as the payment history of that same customer) as shown below:
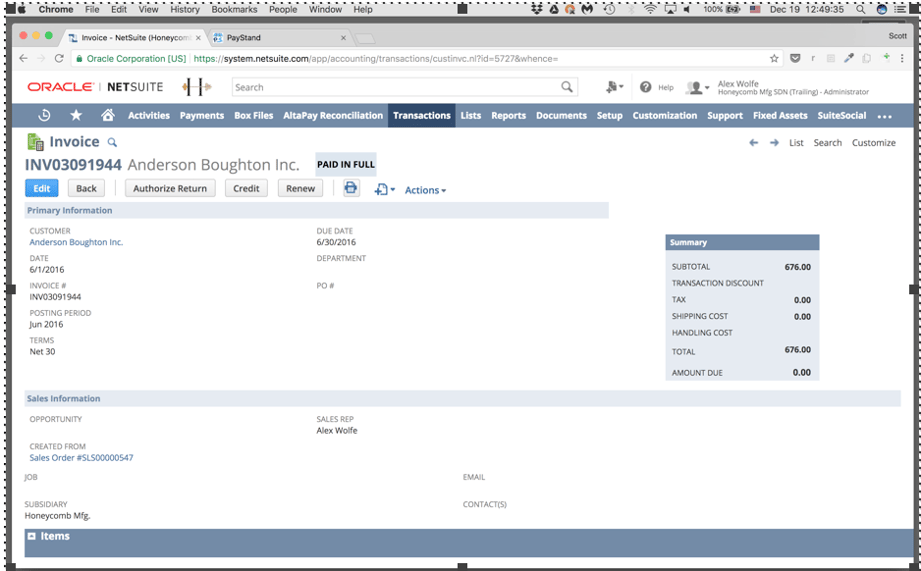
Step 6. A) Because the plugin is coordinating all of the systems' communication, you should be able to view the reconciliation of your NetSuite records, showing the invoice has been paid in full:
Step 7. “Integration Application ID” is the “Application ID” of the Integration record created above.
By sending e-invoices within NetSuite with a “Pay Now” button, you can now begin better automating your receivables! Stay tuned for guides that explain how to set up a virtual terminal and how to add email templates and Advanced PDF/HTML templates of invoices. If you have any questions or need additional clarification, don’t hesitate to contact us. We will be more than happy to answer any inquiries you may have!
PayStand has a NetSuite plugin that offers all of the above-mentioned tools. Feel free to contact us to discuss further.
Not a NetSuite user? We have plugins for other platforms and ERPs: Our general AR services will reform your ROI, you will have access to a 0% payment network, and you will accelerate your time to cash. Additionally, you will have access to a end-to-end, feature-rich dashboard with a range of options to automate other AR processes and tools that will increase your payment remittance. Review our billing payment portal or virtual terminal. We have solutions to many common roadblocks that you may experience in the accounting lifecycle. We look forward to hearing from you!


